Hello everyone, I recently completed a migration from Sitecore 9 to 10. I understand that some may find this move unusual at this point, but each company has its own policies, and better late than never. In this migration, we used Sitecore on Azure PaaS, and in today’s post, I will detail how we provisioned Sitecore on Azure.
In this migration, I encountered several challenges, and I will share with you the problems we faced after the migration in GlassMapper and SOLR.
First step is go to the Azure Portal.
In serach box, serach for Sitecore
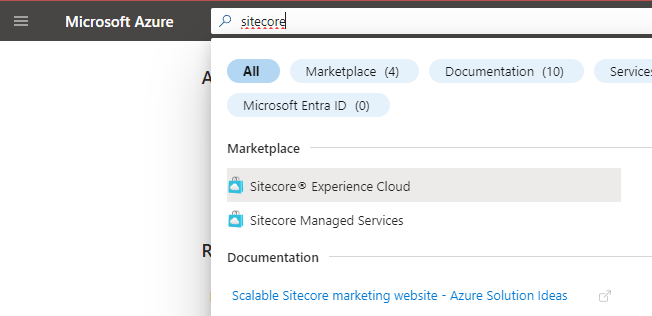
Click on Sitecore Experience Cloud.
The Sitecore Experience Cloud marketplace is ready to roll – it’s essentially your go-to tool for without effort installing Sitecore.
This step is necessary give name to the Resource Group. Once that you have create a new account on Azure, in other hand is possible that you have one Resource Grouo created, in this case no problem use it.
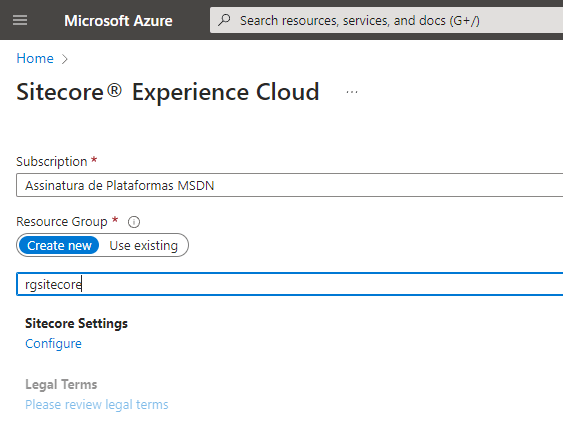
After assigning a name to the resource group, you’ll activate the Sitecore Settings. Navigate to Sitecore Settings and click.
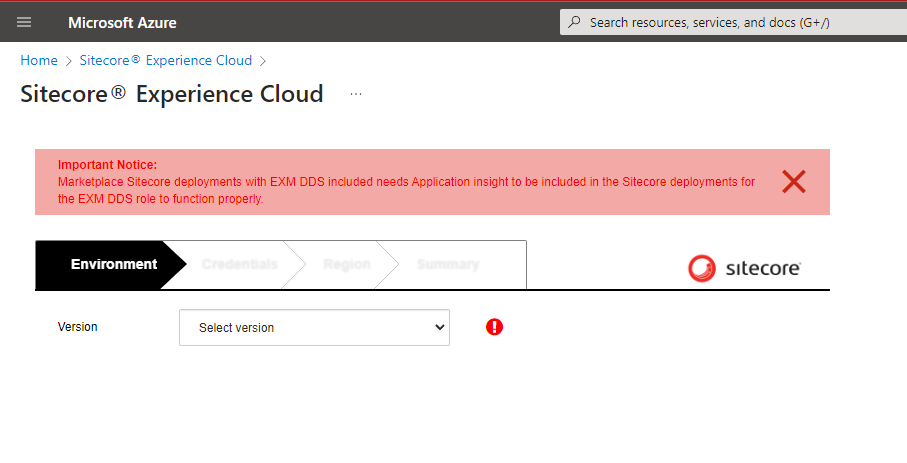
The Marketplace method comes with a few acknowledged issues highlighted at the page’s outset. Although an alternative involves employing ARM templates to install Sitecore on Azure PaaS, this blog will focus on the Sitecore Marketplace approach.
Choose the Version and its associated data. In my case, I’ll opt for Sitecore 10.3 Initial Realease, with the Topology set to XM, Configuration as Development, and the Size specified as Extra Small.
This will generate a development environment, that is a single but you can choose XM Scaled.
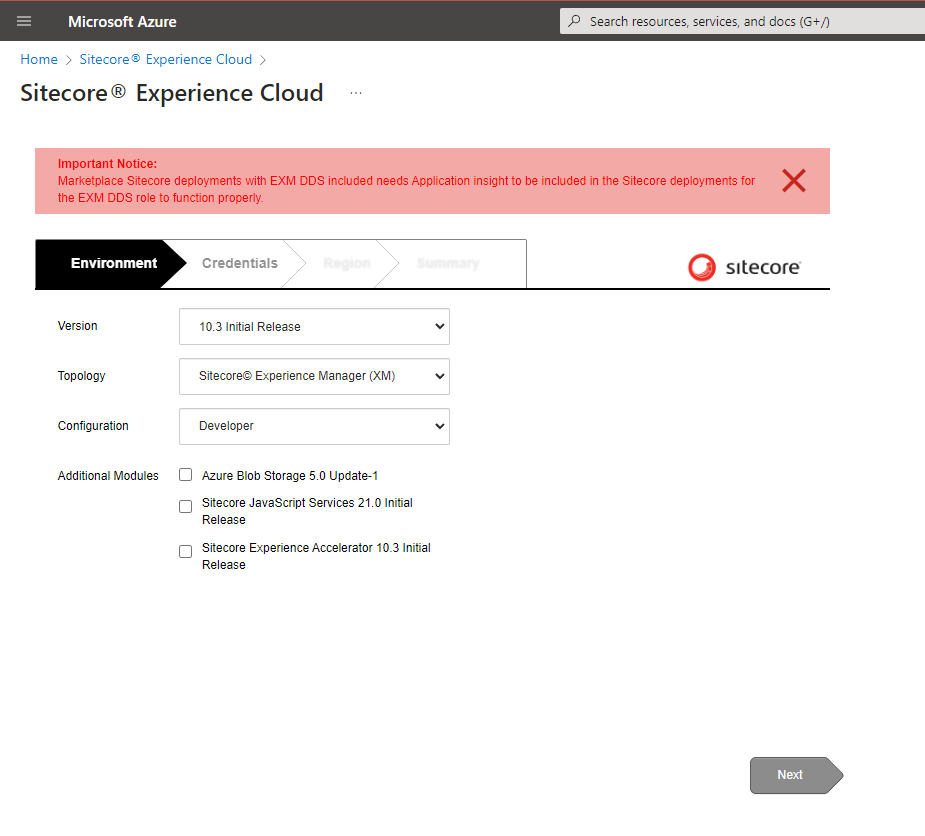
I didn’t choose SXA, this topic is quite extensive, and I’ll reserve discussing it for a future conversation.
Click Next
Navigate to the Credentials tab, where you’ll input the Sitecore admin user’s password, specify the SQL user and password to be established on Azure, upload the license, provide certificate details, and so forth.
If you’re a Sitecore partner, you can obtain the license—I explain everything in this post. How to get your License Sitecore Partner

For SOLR search, ensure to configure it before and indicate the URL at this stage of the installation.
Click Next
Within the region settings, you have the flexibility to choose diverse regions for your application and application insights. Currently, we’ll opt for Brazil South for Location and App Insights.
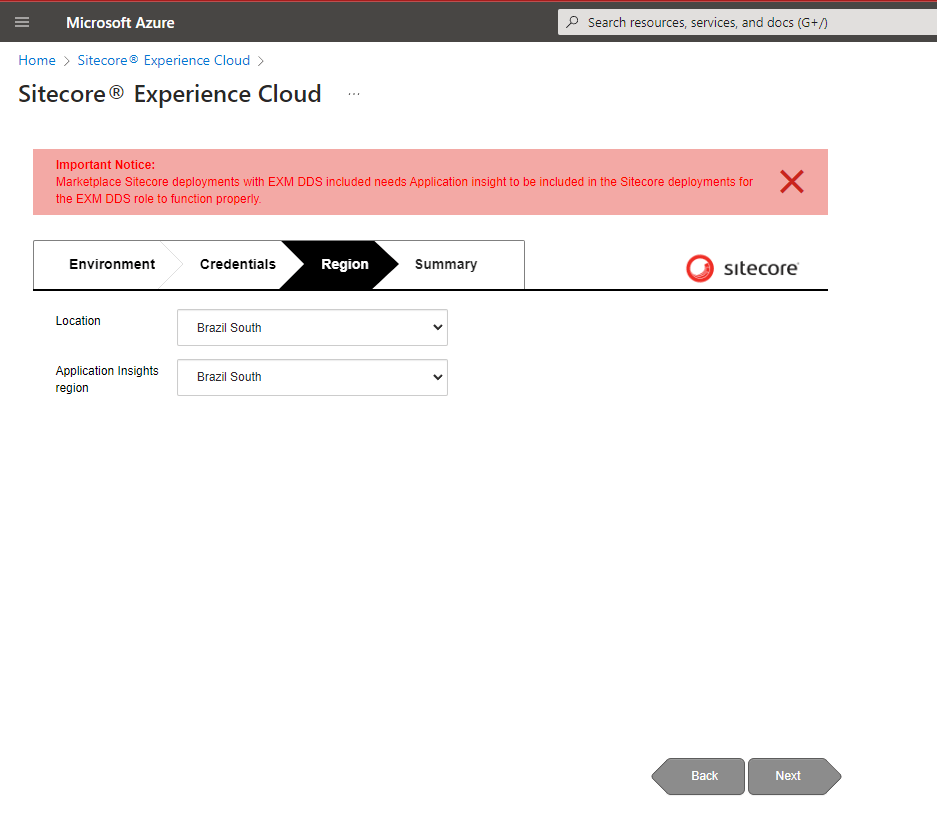
Click Next
On the Summary tab, carefully examine all the particulars and hit the OK button. Proceed to Legal Terms and click on it.
Important : The certificate will not be available for download at any other time during or after the deployment. Please download now if a copy is required.
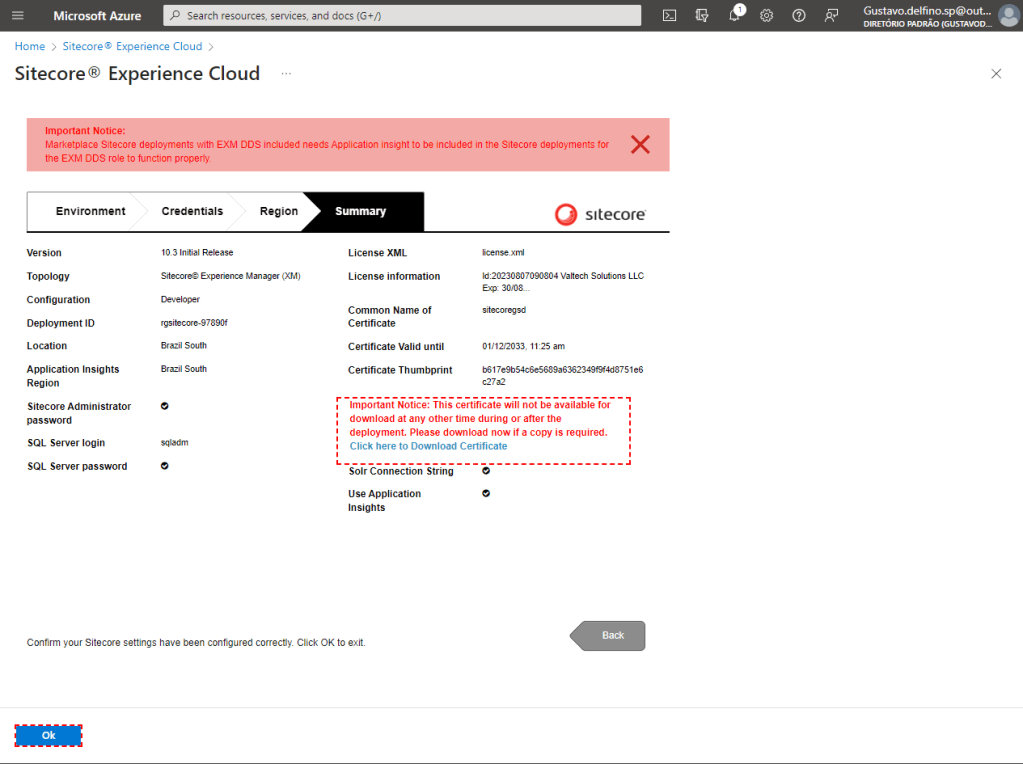
Click OK
Click on Legal Terms.
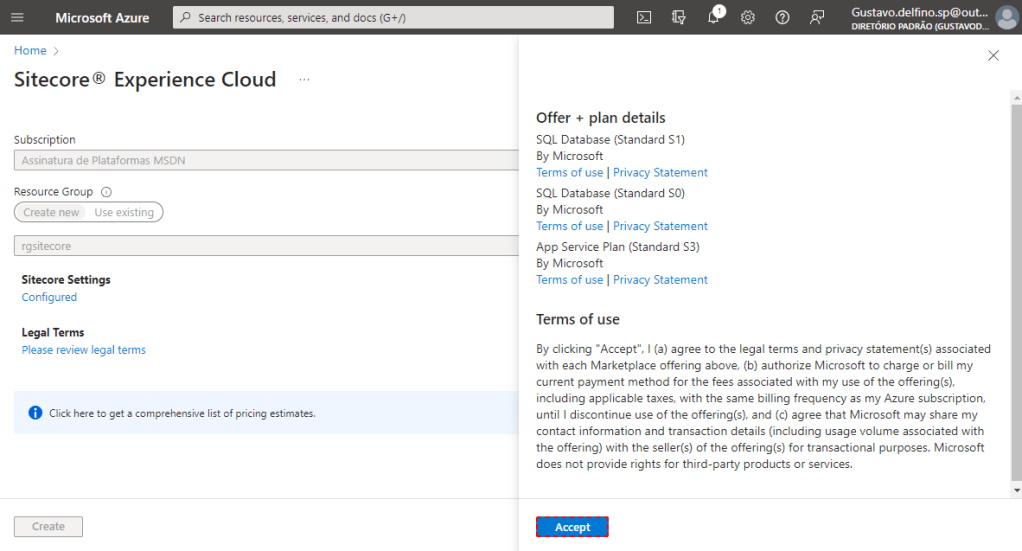
Click Accept
In this moment Sitecore Settongs configured and Legal Terms Accepted Click Create.
The deployment process for Sitecore on Azure PaaS will start.
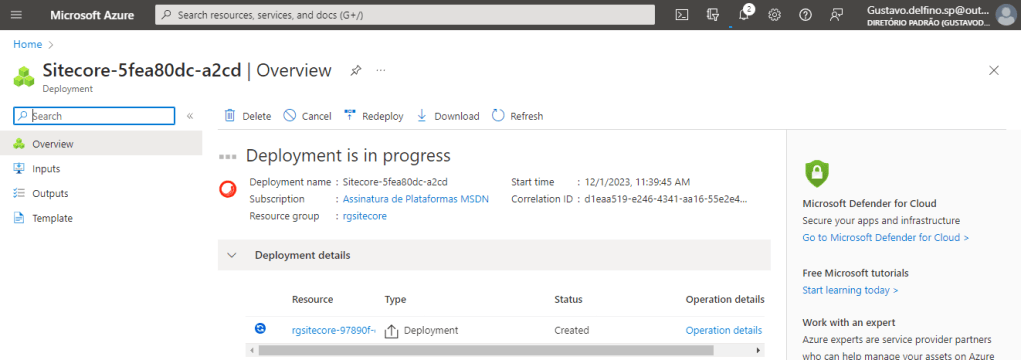
Be patient, provisioning takes a little time.

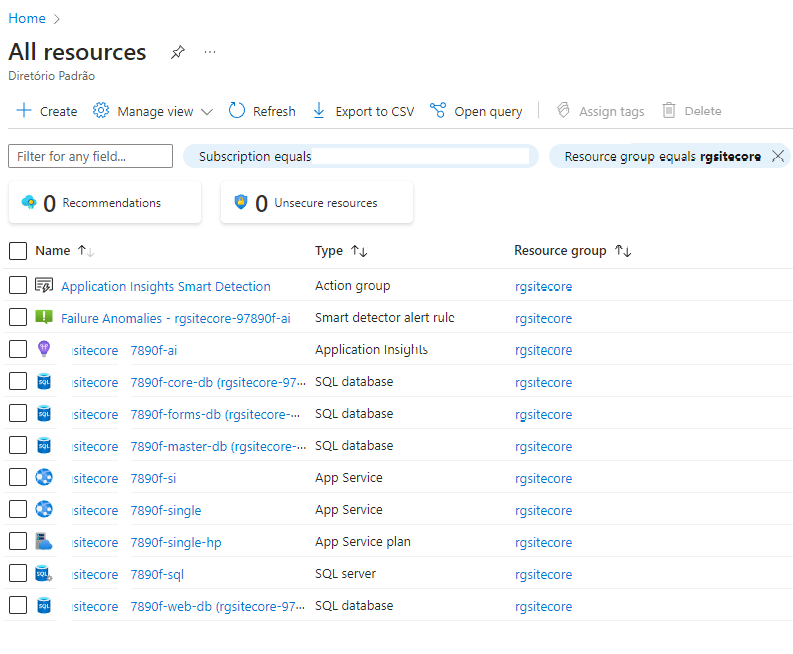
Now, click Go to resource group, in my case, I named it rgsitecore from the beginning this post.
Thanks a bunch! Keep expanding your knowledge, and keep excelling in Sitecore!

Deixe um comentário